Blog

  • Homemade Ice Cream Recipe – No Machine Needed

    Homemade Ice Cream Recipe – No Machine Needed

    Are you craving a creamy, luscious ice cream but don’t own an ice cream maker? Don’t worry! Making homemade ice cream is easier than you think, and you can do it right in your kitchen without any special equipment. This article will guide you step by step to create rich, flavorful ice cream using simple ingredients and methods. Whether you’re looking for a fun dessert for family gatherings or a personal treat, this homemade ice cream recipe will become your go-to favorite.

    Why Homemade Ice Cream is Better

    Homemade ice cream is not only fun to make but also allows you to control the ingredients. Unlike store-bought options, you can avoid preservatives, artificial flavors, and excessive sugar. Plus, making ice cream at home gives you the freedom to experiment with flavors and textures. Imagine fresh strawberries, decadent chocolate swirls, or even a hint of coffee—all in your own creation.

    Benefits of Making Ice Cream at Home

    1. Customization: Tailor your ice cream to your taste, whether fruity, chocolatey, or nutty.

    2. Fresh Ingredients: You decide the quality and quantity of ingredients, ensuring freshness.

    3. Fun Activity: Making ice cream can be a family-friendly or solo creative project.

    4. Dietary Control: Make dairy-free, low-sugar, or vegan versions according to your needs.

    Ingredients Needed

    Here’s a basic list of ingredients for a creamy homemade ice cream without a machine:

    • 2 cups heavy whipping cream

    • 1 cup whole milk

    • ¾ cup granulated sugar

    • 2 teaspoons vanilla extract

    • Optional add-ins: chocolate chips, crushed cookies, fruits, or nuts

    Tip: Use fresh, high-quality cream and milk for the best texture and taste.

    Step-by-Step Guide to Making Ice Cream Without a Machine

    Step 1: Mix the Base

    1. In a large mixing bowl, combine milk and sugar.

    2. Whisk until the sugar is fully dissolved.

    3. Stir in heavy cream and vanilla extract.

    This mixture is the base of your ice cream. At this stage, you can also add flavors like cocoa powder, coffee, or fruit puree.

    Step 2: Whip the Cream (Optional but Recommended)

    Whipping the cream slightly before freezing adds air to the mixture, creating a lighter and creamier texture. Use a hand whisk or an electric mixer for 2-3 minutes until soft peaks form.

    Step 3: Freeze the Mixture

    1. Pour the ice cream mixture into a shallow, freezer-safe container.

    2. Cover with plastic wrap or a lid.

    3. Place it in the freezer for 30 minutes.

    Step 4: Stir Frequently

    To prevent ice crystals from forming, stir the mixture every 30-45 minutes using a spatula or fork. Repeat this for 2-3 hours until the ice cream reaches a soft-serve consistency.

    Step 5: Add Mix-Ins

    Once the ice cream starts to thicken, fold in your chosen add-ins like chocolate chips, cookie pieces, or fruit chunks. This ensures even distribution without melting the base.

    Step 6: Final Freeze

    Cover the container and let the ice cream freeze for another 2-3 hours or until firm. After this, your homemade ice cream is ready to serve.

    Tips for Perfect Ice Cream Every Time

    • Use chilled ingredients: Cold milk and cream freeze faster and form a smoother texture.

    • Avoid overmixing: Stir gently to maintain a creamy consistency.

    • Experiment with flavors: Vanilla is classic, but try chocolate, caramel, mint, or fruit swirls.

    • Use airtight containers: This prevents freezer burn and keeps your ice cream fresh.

    Delicious Flavor Variations

    1. Chocolate Swirl Ice Cream

    Add 1/2 cup melted chocolate to the base mixture. Swirl gently before freezing.

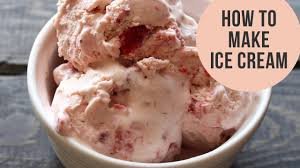
    2. Strawberry Delight

    Mix in fresh strawberry puree and chopped strawberries before the final freeze.

    3. Coffee Lovers

    Dissolve 2 tablespoons instant coffee in a small amount of milk and mix into the base.

    4. Nutty Caramel

    Fold in chopped nuts and drizzle homemade caramel sauce just before the final freeze.

    5. Vegan Coconut Ice Cream

    Replace cream with full-fat coconut milk and milk with almond milk for a dairy-free alternative.

    Serving and Storage

    • Serving: Scoop ice cream with a warm spoon for clean scoops. Top with syrups, fruits, or sprinkles.

    • Storage: Store in an airtight container in the freezer for up to 2 weeks. Avoid repeated thawing and refreezing to maintain texture.

    Common Mistakes to Avoid

    1. Skipping the stirring step: Leads to ice crystals and a hard texture.

    2. Adding ingredients too early: Fresh fruits with high water content can make the ice cream icy.

    3. Using low-fat cream: Results in less creamy, grainy ice cream.

    Why No-Machine Ice Cream Works

    Even without an ice cream maker, the frequent stirring process incorporates air, preventing ice crystals and mimicking the churning of machines. This makes it possible to enjoy creamy, homemade ice cream using simple kitchen tools.

    Conclusion

    Making homemade ice cream without a machine is both fun and rewarding. With fresh ingredients, creativity, and a bit of patience, you can create dessert masterpieces right in your kitchen. Whether you stick to classic vanilla or experiment with bold flavors, this method ensures smooth, creamy ice cream every time.

    So grab your cream, milk, and favorite add-ins, and start making delicious ice cream today! 🍦

  • Easy Fried Rice Recipe – Quick Asian Dish

    Easy Fried Rice Recipe – Quick Asian Dish

    Meta Description:
    Learn how to make easy fried rice at home with this quick and delicious Asian recipe. Perfect for beginners, ready in 20 minutes, and customizable with your favorite ingredients.


    Introduction

    Fried rice is one of the most popular and versatile dishes in Asian cuisine. Its simplicity, speed, and ability to adapt to different ingredients make it a favorite for home cooks and professional chefs alike. Whether you have leftover rice, vegetables, or meats, fried rice is a fantastic way to transform them into a delicious, satisfying meal.

    In this article, we will guide you step-by-step on how to make easy fried rice that is flavorful, quick to prepare, and perfect for busy weeknights. You’ll also learn tips to enhance its taste, the best type of rice to use, and ways to make it healthier without compromising on flavor.


    Why Fried Rice Is a Great Choice

    1. Quick and Easy: Most fried rice recipes take less than 30 minutes from start to finish.

    2. Budget-Friendly: Perfect for using leftover rice and ingredients from your fridge.

    3. Versatile: You can add any vegetables, proteins, or sauces to match your taste.

    4. Family-Friendly: Loved by kids and adults alike.

    With these advantages, it’s no wonder fried rice has become a staple in households around the world.


    Ingredients You’ll Need

    For this recipe, you’ll need the following ingredients:

    Ingredient Quantity
    Cooked white rice (preferably day-old) 3 cups
    Eggs 2
    Carrots (diced) 1/2 cup
    Peas 1/2 cup
    Onion (chopped) 1 small
    Garlic (minced) 2 cloves
    Soy sauce 3 tbsp
    Sesame oil 1 tsp
    Vegetable oil 2 tbsp
    Spring onions (chopped) 2 tbsp
    Salt & pepper To taste

    Optional Ingredients for Extra Flavor:

    • Cooked chicken, shrimp, or beef

    • Bell peppers, corn, or mushrooms

    • Chili flakes for spice


    Step-by-Step Instructions

    Step 1: Prepare the Rice

    • Use day-old rice for the best texture; fresh rice can become mushy.

    • Break up any clumps gently with a fork.

    Step 2: Cook the Eggs

    • Heat 1 tablespoon of vegetable oil in a wok or skillet over medium heat.

    • Beat the eggs and pour them into the hot pan.

    • Scramble until just cooked, then remove from the pan and set aside.

    Step 3: Sauté the Vegetables

    • Add the remaining vegetable oil to the pan.

    • Sauté onions and garlic until fragrant.

    • Add carrots, peas, and any other vegetables you like. Cook for 3-4 minutes.

    Step 4: Combine Rice and Vegetables

    • Add the cooked rice to the pan with vegetables.

    • Stir-fry for 5 minutes until heated through.

    Step 5: Add Eggs and Seasonings

    • Return the scrambled eggs to the pan.

    • Add soy sauce, sesame oil, salt, and pepper.

    • Mix well to ensure everything is evenly coated.

    Step 6: Garnish and Serve

    • Turn off the heat and sprinkle chopped spring onions on top.

    • Serve hot with your favorite Asian side dishes or enjoy it on its own.


    Tips for the Perfect Fried Rice

    1. Use Cold, Day-Old Rice: Prevents mushiness and gives better texture.

    2. High Heat Cooking: Stir-frying on high heat enhances flavor.

    3. Don’t Overcrowd the Pan: Cook in batches if necessary.

    4. Customize Protein: Add shrimp, chicken, or tofu to make it more filling.

    5. Enhance Flavor: Add oyster sauce, chili sauce, or ginger for more depth.


    Variations of Fried Rice

    1. Chicken Fried Rice

    • Add diced cooked chicken with vegetables for a hearty meal.

    2. Shrimp Fried Rice

    • Use shrimp instead of chicken for a seafood twist.

    3. Vegetable Fried Rice

    • Skip the meat and use a variety of vegetables for a vegan option.

    4. Spicy Fried Rice

    • Add chili paste, sriracha, or crushed red pepper for a spicy kick.


    Nutritional Benefits

    Fried rice can be a balanced meal if prepared with the right ingredients:

    • Protein: Eggs and meat provide essential amino acids.

    • Fiber: Vegetables like peas, carrots, and bell peppers aid digestion.

    • Carbohydrates: Rice gives energy for daily activities.

    • Healthy Fats: Using sesame oil adds flavor and good fats.


    Common Mistakes to Avoid

    • Using Fresh Rice: It can become sticky and clump together.

    • Overcooking Vegetables: Keeps them crunchy and vibrant.

    • Too Much Soy Sauce: Can make the dish overly salty.

    • Neglecting High Heat: Low heat results in soggy rice.


    Frequently Asked Questions (FAQs)

    Q1: Can I use brown rice for fried rice?
    Yes, but cooking time may be slightly longer, and the texture will be nuttier.

    Q2: Can I make fried rice without eggs?
    Absolutely! Simply omit eggs or use tofu as a protein substitute.

    Q3: How can I make it healthier?
    Use brown rice, less oil, and more vegetables to boost nutrition.

    Q4: Can I freeze fried rice?
    Yes, cool completely, store in an airtight container, and freeze for up to 2 months.


    Conclusion

    Making easy fried rice at home is a simple yet satisfying way to enjoy a quick Asian dish. With minimal ingredients, a few simple steps, and the flexibility to add your favorite proteins and vegetables, you can create a flavorful, restaurant-style meal in under 30 minutes.

    Whether you’re a beginner cook or looking to impress your family, this recipe provides a perfect balance of taste, nutrition, and convenience. Try this fried rice recipe today and discover how a few simple ingredients can create a dish full of flavor and joy!

  • Spicy Chicken Tikka Recipe – BBQ Style at Home

    Spicy Chicken Tikka Recipe – BBQ Style at Home

    Introduction

    If you love bold flavors and smoky grilled dishes, the Spicy Chicken Tikka Recipe – BBQ Style at Home is the perfect dish to try. Chicken tikka is one of the most popular South Asian barbecue recipes, known for its rich spices, smoky aroma, and tender texture. Traditionally cooked in a clay oven called a tandoor, this delicious dish can easily be recreated at home using a grill, oven, or even a stovetop pan.

    Preparing spicy chicken tikka at home allows you to control the ingredients, adjust the spice level, and enjoy a restaurant-style BBQ experience without leaving your kitchen. The combination of yogurt, aromatic spices, lemon juice, and garlic creates a flavorful marinade that penetrates the chicken and gives it a juicy, smoky taste when grilled.

    In this article, you will learn a step-by-step spicy chicken tikka recipe, including ingredients, marinade tips, cooking methods, and serving suggestions so you can prepare perfect BBQ-style chicken tikka at home.


    What is Chicken Tikka?

    Chicken tikka is a famous grilled chicken dish originating from South Asia. The word “tikka” means small pieces or chunks. In this dish, boneless chicken pieces are marinated in a mixture of yogurt, spices, and herbs, then grilled or roasted until slightly charred.

    This dish is loved for its:

    • Smoky BBQ flavor

    • Spicy and tangy marinade

    • Tender and juicy chicken pieces

    • Perfect pairing with naan, chutney, and salad

    Chicken tikka is commonly served as a starter, side dish, or even wrapped in paratha to make delicious rolls.


    Ingredients for Spicy Chicken Tikka

    To prepare authentic BBQ-style spicy chicken tikka, you will need the following ingredients.

    Main Ingredients

    • 500 grams boneless chicken (cut into cubes)

    • 1 cup thick yogurt

    • 2 tablespoons lemon juice

    • 2 tablespoons cooking oil or mustard oil

    • 1 tablespoon ginger garlic paste

    • 1 teaspoon salt (or to taste)

    Spices

    • 1 teaspoon red chili powder

    • 1 teaspoon Kashmiri chili powder (for color)

    • 1 teaspoon turmeric powder

    • 1 teaspoon garam masala

    • 1 teaspoon cumin powder

    • 1 teaspoon coriander powder

    • 1 teaspoon paprika

    • ½ teaspoon black pepper

    Optional Ingredients

    • 1 tablespoon cream (for extra tenderness)

    • 1 teaspoon roasted gram flour (besan)

    • 1 teaspoon crushed kasuri methi (dried fenugreek)

    For Garnishing

    • Onion rings

    • Lemon wedges

    • Fresh coriander leaves

    • Mint chutney


    Step-by-Step Spicy Chicken Tikka Recipe

    Follow these simple steps to prepare delicious homemade chicken tikka.

    Step 1: Prepare the Chicken

    Start by washing the chicken pieces thoroughly and patting them dry with a paper towel. Cut the chicken into medium-sized cubes so they cook evenly on the grill.

    Make small cuts on the chicken pieces. This helps the marinade penetrate deeper and enhances the flavor.


    Step 2: Prepare the Marinade

    In a large mixing bowl, add:

    • Yogurt

    • Lemon juice

    • Ginger garlic paste

    • Red chili powder

    • Kashmiri chili powder

    • Turmeric

    • Garam masala

    • Cumin powder

    • Coriander powder

    • Paprika

    • Salt

    • Black pepper

    Mix everything well until a smooth marinade forms.

    Add cooking oil, cream, and crushed kasuri methi for extra flavor.


    Step 3: Marinate the Chicken

    Add the chicken cubes to the marinade and coat them thoroughly. Make sure each piece is fully covered with the spice mixture.

    Cover the bowl with plastic wrap and place it in the refrigerator.

    Marination Time

    • Minimum: 2 hours

    • Best flavor: 6–8 hours

    • Ideal: Overnight

    Longer marination results in more flavorful and tender chicken tikka.


    Cooking Methods for Chicken Tikka

    You can cook chicken tikka using different methods depending on the equipment available in your kitchen.


    1. BBQ Grill Method

    This method gives the most authentic smoky flavor.

    1. Preheat your BBQ grill to medium-high heat.

    2. Thread the marinated chicken pieces onto skewers.

    3. Place the skewers on the grill.

    4. Cook for about 10–15 minutes, turning occasionally.

    5. Brush with butter or oil while grilling.

    The chicken should develop a slightly charred surface while remaining juicy inside.


    2. Oven Method

    If you do not have a grill, the oven works perfectly.

    1. Preheat the oven to 200°C (392°F).

    2. Place marinated chicken pieces on a baking tray or rack.

    3. Bake for 20–25 minutes.

    4. Turn the pieces halfway through cooking.

    For extra BBQ flavor, switch the oven to broil mode for the last 5 minutes.


    3. Pan or Stovetop Method

    You can also make chicken tikka in a frying pan.

    1. Heat 2 tablespoons oil in a pan.

    2. Place marinated chicken pieces in the pan.

    3. Cook on medium heat for 12–15 minutes.

    4. Turn frequently until the chicken is fully cooked.

    Although it lacks smoky flavor, it still tastes delicious.


    Tips for Perfect BBQ Chicken Tikka

    Follow these tips to achieve restaurant-style results at home.

    Use Thick Yogurt

    Thin yogurt can make the marinade watery. Always use thick or Greek yogurt for best results.

    Do Not Skip Marination

    Marinating the chicken for several hours allows spices to penetrate deeply.

    Use Mustard Oil

    Traditional BBQ chicken tikka uses mustard oil, which enhances the authentic flavor.

    High Heat Cooking

    Chicken tikka tastes best when cooked at high temperature, which creates a slightly charred outer layer.

    Add Smoky Flavor (Optional)

    To create a tandoori-style smoky aroma at home, you can use the coal smoke method:

    1. Heat a small piece of charcoal.

    2. Place it in a small bowl inside the chicken container.

    3. Pour a little oil on the coal and cover the dish.

    4. Let it smoke for 5 minutes.

    This gives a restaurant-style BBQ flavor.


    Serving Suggestions

    Spicy chicken tikka is best served hot with traditional sides.

    Popular serving options include:

    • Mint chutney

    • Fresh naan or tandoori roti

    • Onion salad

    • Lemon wedges

    • Yogurt raita

    • Basmati rice

    You can also use chicken tikka in:

    • Wraps

    • Sandwiches

    • Pizza toppings

    • Rice bowls


    Nutritional Benefits of Chicken Tikka

    Chicken tikka is not only tasty but also nutritious.

    High Protein

    Chicken is a great source of protein, which helps build muscles and keeps you full longer.

    Low Carbohydrates

    This dish is naturally low in carbohydrates, making it suitable for many diet plans.

    Rich in Spices

    Spices like turmeric, cumin, and coriander provide antioxidants and anti-inflammatory benefits.

    Healthy Cooking Option

    When grilled or baked instead of fried, chicken tikka becomes a healthier meal choice.


    Variations of Chicken Tikka

    You can try different versions of chicken tikka depending on your taste.

    Malai Chicken Tikka

    A creamy version made with cheese, cream, and mild spices.

    Hariyali Chicken Tikka

    Prepared with green herbs like mint and coriander for a fresh flavor.

    Achari Chicken Tikka

    Made using pickle spices for a tangy and spicy taste.

    Tandoori Chicken Tikka

    Cooked traditionally in a clay tandoor for intense smoky flavor.


    Common Mistakes to Avoid

    Avoid these mistakes when making chicken tikka at home.

    • Using too much yogurt in the marinade

    • Cooking chicken at low heat

    • Skipping marination time

    • Overcooking the chicken

    • Not turning the pieces while grilling

    Proper technique ensures juicy and flavorful chicken tikka every time.


    Conclusion

    The Spicy Chicken Tikka Recipe – BBQ Style at Home is a simple yet incredibly flavorful dish that you can easily prepare in your own kitchen. With the right blend of spices, a good marinade, and proper cooking technique, you can recreate the authentic taste of restaurant-style chicken tikka without needing a traditional tandoor.

    Whether you grill it on a BBQ, bake it in the oven, or cook it in a pan, this recipe delivers tender, juicy, and perfectly spiced chicken every time. Serve it with fresh naan, mint chutney, and salad for a complete and satisfying meal.

    Try this homemade spicy chicken tikka recipe and enjoy a delicious BBQ-style dish with family and friends right at home.

  • Classic Beef Burger Recipe – Juicy and Flavorful

    Classic Beef Burger Recipe – Juicy and Flavorful

    A classic beef burger is one of the most loved comfort foods around the world. Known for its juicy beef patty, soft bun, and delicious toppings, this timeless recipe is perfect for family dinners, weekend barbecues, or casual gatherings with friends. When made at home with fresh ingredients, a beef burger becomes even more flavorful and satisfying.

    In this recipe, you will learn how to prepare a perfectly juicy and flavorful beef burger using simple ingredients and easy steps. The secret lies in selecting quality ground beef, seasoning it properly, and cooking the patty just right to keep it tender and juicy. With the right combination of toppings and sauces, this homemade burger will taste even better than many restaurant versions.


    Ingredients

    For the Beef Patty

    • 500g ground beef (80% lean, 20% fat recommended)

    • 1 teaspoon salt

    • 1/2 teaspoon black pepper

    • 1 teaspoon garlic powder

    • 1 teaspoon onion powder

    • 1 tablespoon Worcestershire sauce

    For the Burger

    • 4 burger buns

    • 4 slices cheddar cheese

    • Lettuce leaves

    • Tomato slices

    • Onion rings

    • Pickles (optional)

    • 2 tablespoons mayonnaise

    • 2 tablespoons ketchup

    • 1 tablespoon mustard

    • 1 tablespoon butter (for toasting buns)


    Instructions

    1. Prepare the Beef Mixture

    In a large mixing bowl, combine the ground beef, salt, black pepper, garlic powder, onion powder, and Worcestershire sauce. Mix gently using your hands until the ingredients are just combined. Avoid overmixing as it can make the patties tough.

    2. Shape the Patties

    Divide the beef mixture into four equal portions. Shape each portion into a round patty about ¾ inch thick. Press a small indentation in the center of each patty with your thumb. This helps the patty cook evenly and prevents it from puffing up.

    3. Cook the Patties

    Heat a grill pan or skillet over medium-high heat. Place the patties on the hot surface and cook for about 4–5 minutes on each side depending on your preferred doneness.

    During the last minute of cooking, place a slice of cheddar cheese on each patty and allow it to melt slightly.

    4. Toast the Buns

    Lightly spread butter on the inside of the burger buns and toast them in a pan for 1–2 minutes until golden and slightly crispy. Toasting the buns enhances flavor and prevents them from becoming soggy.

    5. Assemble the Burger

    Spread mayonnaise, ketchup, and mustard on the toasted buns. Place lettuce on the bottom bun, followed by the juicy beef patty with melted cheese. Add tomato slices, onion rings, and pickles if desired. Cover with the top bun.


    Tips for the Perfect Juicy Beef Burger

    • Use 80/20 ground beef for the best balance of flavor and juiciness.

    • Do not press the patty while cooking, as it releases the juices.

    • Let the cooked patties rest for 1–2 minutes before assembling the burger.

    • Fresh toppings like lettuce, tomatoes, and onions add texture and flavor.

    • Lightly toasting the buns improves both taste and structure.


    Serving Suggestions

    A classic beef burger tastes even better when served with:

    • Crispy French fries

    • Potato wedges

    • Coleslaw salad

    • Onion rings

    • Fresh lemonade or soft drinks

    These sides create a complete and satisfying meal for lunch or dinner.


    Conclusion

    This Classic Beef Burger Recipe is simple, delicious, and perfect for anyone who loves homemade comfort food. With a juicy beef patty, melted cheese, and fresh toppings, this burger delivers rich flavor in every bite. By following the steps and tips above, you can easily prepare a restaurant-style burger right in your own kitchen.

    Try this recipe for your next meal and enjoy a juicy, flavorful homemade beef burger that everyone will love.

  • Chocolate Cake Recipe – Soft and Moist Homemade Cake

    Chocolate Cake Recipe – Soft and Moist Homemade Cake

    Introduction

    Chocolate cake is one of the most loved desserts around the world. Its rich chocolate flavor, soft texture, and moist crumb make it perfect for birthdays, celebrations, or simply enjoying with a cup of tea or coffee. A homemade chocolate cake is always better than store-bought cakes because it is fresh, customizable, and made with simple kitchen ingredients.

    This soft and moist chocolate cake recipe is easy to prepare and perfect for beginners as well as experienced bakers. With the right balance of cocoa, sugar, and butter, this cake turns out incredibly fluffy and delicious every time. Whether you want to bake for your family or impress your guests, this recipe will help you make the perfect homemade chocolate cake.


    Ingredients for Chocolate Cake

    To make a soft and moist chocolate cake at home, you will need the following ingredients:

    • 1 ¾ cups all-purpose flour

    • ¾ cup unsweetened cocoa powder

    • 2 cups sugar

    • 1 ½ teaspoons baking powder

    • 1 ½ teaspoons baking soda

    • ½ teaspoon salt

    • 2 large eggs

    • 1 cup milk

    • ½ cup vegetable oil

    • 2 teaspoons vanilla extract

    • 1 cup hot water or hot coffee

    These ingredients create the perfect texture and deep chocolate flavor that makes the cake rich and moist.


    Kitchen Equipment Needed

    Before starting the recipe, make sure you have these basic kitchen tools:

    • Mixing bowls

    • Electric mixer or whisk

    • Cake baking pan

    • Measuring cups and spoons

    • Oven

    • Spatula

    Using the correct equipment helps ensure your cake bakes evenly and rises properly.


    Step-by-Step Instructions

    1. Preheat the Oven

    Preheat your oven to 180°C (350°F). Grease and lightly flour a 9-inch cake pan to prevent the cake from sticking.

    2. Mix the Dry Ingredients

    In a large mixing bowl, combine:

    • Flour

    • Cocoa powder

    • Sugar

    • Baking powder

    • Baking soda

    • Salt

    Mix these ingredients well so that everything is evenly distributed.

    3. Add Wet Ingredients

    Add the eggs, milk, vegetable oil, and vanilla extract to the dry ingredients. Beat the mixture using a mixer or whisk for about 2 minutes until smooth.

    4. Add Hot Water or Coffee

    Slowly pour in the hot water (or hot coffee) and mix gently. The batter will become thin, which is normal and helps create a moist cake.

    5. Pour into Baking Pan

    Pour the cake batter into the prepared cake pan and spread it evenly.

    6. Bake the Cake

    Place the pan in the preheated oven and bake for 30–35 minutes. Insert a toothpick in the center of the cake; if it comes out clean, the cake is ready.

    7. Cool the Cake

    Remove the cake from the oven and allow it to cool in the pan for about 10 minutes. Then transfer it to a wire rack to cool completely.


    Chocolate Frosting (Optional)

    For extra flavor, you can add a simple chocolate frosting.

    Ingredients

    • ½ cup butter

    • ⅔ cup cocoa powder

    • 3 cups powdered sugar

    • ⅓ cup milk

    • 1 teaspoon vanilla extract

    Instructions

    1. Melt the butter in a bowl.

    2. Add cocoa powder and mix well.

    3. Gradually add powdered sugar and milk while mixing.

    4. Add vanilla extract and beat until smooth.

    Spread the frosting over the cooled cake for a rich chocolate finish.


    Tips for a Perfect Moist Chocolate Cake

    To achieve the best results, follow these baking tips:

    • Use room temperature ingredients for better mixing.

    • Do not overmix the batter.

    • Measure ingredients accurately.

    • Use hot coffee instead of water to enhance chocolate flavor.

    • Allow the cake to cool completely before frosting.


    Nutritional Information (Approximate per Slice)

    • Calories: 320

    • Carbohydrates: 45g

    • Protein: 5g

    • Fat: 14g

    This homemade chocolate cake is a delightful treat that can be enjoyed occasionally as part of a balanced diet.


    Conclusion

    This soft and moist homemade chocolate cake recipe is simple, delicious, and perfect for any occasion. With easy ingredients and straightforward steps, anyone can bake a bakery-style chocolate cake at home. Whether you serve it plain, dusted with powdered sugar, or topped with rich chocolate frosting, this cake is guaranteed to satisfy every chocolate lover.

    If you are looking for a reliable chocolate cake recipe that turns out soft, fluffy, and moist every time, this homemade version is the perfect choice for your kitchen. 🍫🍰

  • Healthy Vegetable Soup Recipe – Simple and Nutritious

    Healthy Vegetable Soup Recipe – Simple and Nutritious

    Introduction

    A Healthy Vegetable Soup Recipe is one of the easiest and most nourishing meals you can prepare at home. Packed with fresh vegetables, vitamins, and minerals, this simple soup is perfect for anyone looking to enjoy a light yet satisfying dish. Whether you want a comforting meal during colder months or a healthy addition to your daily diet, vegetable soup is a great choice.

    This simple and nutritious vegetable soup is not only quick to prepare but also highly customizable. You can use a variety of seasonal vegetables to create a flavorful and wholesome bowl of soup that supports a balanced diet. With minimal ingredients and easy steps, this recipe is ideal for beginners and experienced home cooks alike.


    Why Choose Healthy Vegetable Soup?

    Vegetable soup is a popular healthy meal because it provides many essential nutrients while remaining low in calories. Here are a few benefits:

    • Rich in vitamins and minerals

    • Supports digestion and hydration

    • Helps maintain a healthy weight

    • Easy to prepare and budget-friendly

    • Perfect for lunch, dinner, or meal prep


    Ingredients

    To prepare this simple vegetable soup, you will need the following ingredients:

    • 1 tablespoon olive oil

    • 1 medium onion, finely chopped

    • 2 cloves garlic, minced

    • 1 carrot, diced

    • 1 potato, diced

    • 1 cup chopped cabbage

    • 1 cup green beans, chopped

    • 1 tomato, chopped

    • 4 cups vegetable broth or water

    • ½ teaspoon black pepper

    • ½ teaspoon salt (adjust to taste)

    • ½ teaspoon dried herbs (oregano or thyme)

    • Fresh coriander or parsley for garnish


    Step-by-Step Instructions

    1. Prepare the Vegetables

    Wash and chop all the vegetables into small, even pieces. This helps them cook evenly and gives the soup a balanced texture.

    2. Sauté the Aromatics

    Heat olive oil in a large pot over medium heat. Add the chopped onion and cook for about 2–3 minutes until it becomes soft. Then add minced garlic and sauté for another minute to release its aroma.

    3. Add the Vegetables

    Add the carrots, potatoes, cabbage, and green beans to the pot. Stir the vegetables gently so they mix well with the onions and garlic.

    4. Pour the Broth

    Add the vegetable broth or water and bring the mixture to a gentle boil. This will help all the ingredients cook together and develop flavor.

    5. Simmer the Soup

    Reduce the heat to low and allow the soup to simmer for about 15–20 minutes, or until the vegetables become tender.

    6. Season the Soup

    Add chopped tomatoes, salt, black pepper, and herbs. Let the soup cook for another 5 minutes to enhance the taste.

    7. Serve and Garnish

    Turn off the heat and garnish the soup with fresh coriander or parsley. Serve the soup hot for the best flavor.


    Tips for Making the Best Vegetable Soup

    • Use fresh seasonal vegetables for better flavor and nutrition.

    • Add spinach or broccoli for extra vitamins.

    • If you prefer a thicker soup, mash a few cooked vegetables in the pot.

    • For added protein, include beans, lentils, or tofu.

    • Adjust seasoning according to your taste.


    Nutritional Benefits

    This healthy vegetable soup is loaded with nutrients that support overall health:

    • Carrots provide vitamin A for eye health.

    • Cabbage contains antioxidants and fiber.

    • Tomatoes supply vitamin C and lycopene.

    • Potatoes add natural energy and potassium.

    Because it is low in fat and calories, this soup is also suitable for those following a weight-loss or balanced diet plan.


    Conclusion

    The Healthy Vegetable Soup Recipe – Simple and Nutritious is a perfect dish for anyone who wants a quick, wholesome, and flavorful meal. With fresh vegetables, simple ingredients, and easy cooking steps, this soup delivers both taste and nutrition in every bowl.

    Whether you prepare it for a family dinner, a light lunch, or meal prep for the week, this vegetable soup is a comforting and healthy option that everyone can enjoy. Try this recipe today and experience the goodness of homemade vegetable soup. 🥣🌿

  • Creamy Pasta Recipe – Quick Dinner Idea 🍝

    Creamy Pasta Recipe – Quick Dinner Idea 🍝

    Introduction

    When you need a delicious meal but have limited time, a creamy pasta recipe is the perfect solution. This comforting dish combines tender pasta with a rich, velvety sauce that satisfies both your hunger and your taste buds. Whether you’re preparing dinner for your family or looking for a quick meal after a busy day, creamy pasta is an easy and flavorful option.

    One of the best things about creamy pasta is its versatility. You can customize it with vegetables, chicken, shrimp, or mushrooms to suit your preferences. In just about 20–30 minutes, you can create a restaurant-style dish right in your own kitchen.


    Why You’ll Love This Creamy Pasta Recipe

    • Quick and easy to prepare

    • Perfect for busy weeknight dinners

    • Uses simple, everyday ingredients

    • Rich, creamy, and satisfying flavor

    • Easily customizable with different proteins or vegetables


    Ingredients

    To make this quick creamy pasta recipe, you will need:

    • 250 grams pasta (penne, fettuccine, or spaghetti)

    • 2 tablespoons butter

    • 2 cloves garlic (minced)

    • 1 cup heavy cream

    • ½ cup grated parmesan cheese

    • 1 teaspoon black pepper

    • Salt to taste

    • ½ teaspoon chili flakes (optional)

    • 1 tablespoon olive oil

    • Fresh parsley for garnish

    Optional additions:

    • Grilled chicken

    • Mushrooms

    • Broccoli

    • Shrimp


    Step-by-Step Instructions

    1. Cook the Pasta

    Boil water in a large pot and add a pinch of salt. Cook the pasta according to the package instructions until al dente. Drain and set aside.

    2. Prepare the Creamy Sauce

    In a large pan, heat olive oil and butter over medium heat. Add minced garlic and sauté for about 1 minute until fragrant.

    3. Add Cream and Seasoning

    Pour in the heavy cream and stir gently. Add salt, black pepper, and chili flakes. Let the sauce simmer for 3–4 minutes until it thickens slightly.

    4. Mix in Cheese

    Add grated parmesan cheese and stir until it melts into the sauce, creating a smooth and creamy texture.

    5. Combine Pasta and Sauce

    Add the cooked pasta to the pan and toss well so the pasta is fully coated in the creamy sauce.

    6. Garnish and Serve

    Sprinkle fresh parsley on top and serve hot. You can also add extra parmesan cheese for more flavor.


    Tips for the Best Creamy Pasta

    • Use freshly grated parmesan for better flavor.

    • Do not overcook the pasta; al dente texture works best.

    • Add pasta water if the sauce becomes too thick.

    • For extra richness, add a little cream cheese or butter.


    Variations of Creamy Pasta

    You can easily customize this recipe to create different versions:

    Creamy Chicken Pasta: Add grilled or shredded chicken.
    Mushroom Creamy Pasta: Sauté mushrooms with garlic before adding cream.
    Seafood Creamy Pasta: Add shrimp or salmon for a seafood twist.
    Vegetable Creamy Pasta: Include broccoli, spinach, or bell peppers.


    Nutritional Benefits

    While creamy pasta is indulgent, it also provides carbohydrates for energy and protein if you add meat or cheese. Adding vegetables can increase fiber and nutritional value.


    Conclusion

    This creamy pasta recipe is the ultimate quick dinner idea for anyone who wants a comforting and delicious meal without spending hours in the kitchen. With simple ingredients and easy steps, you can create a rich and satisfying pasta dish in less than half an hour. Try it today and enjoy a restaurant-quality meal at home.

  • Traditional Pakistani Karahi Recipe – Restaurant Style

    Traditional Pakistani Karahi Recipe – Restaurant Style

    Introduction

    The Traditional Pakistani Karahi is one of the most iconic dishes in Pakistani cuisine. Known for its rich aroma, bold spices, and fresh ingredients, this dish is a staple in homes, roadside dhabas, and high-end restaurants across Pakistan. The word Karahi refers to the deep, wok-like cooking vessel in which the dish is traditionally prepared.

    Restaurant-style Pakistani Karahi is loved for its intense flavor, minimal spices, and the perfect balance of tomatoes, green chilies, and tender meat. Unlike many curries, Karahi focuses on natural ingredients and fresh herbs, giving it a unique taste that makes it stand out among South Asian dishes.

    In this article, we will guide you through the authentic restaurant-style Pakistani Karahi recipe so you can recreate the same delicious flavor in your own kitchen.


    What is Pakistani Karahi?

    Pakistani Karahi is a traditional meat dish typically made with chicken, mutton, or beef, cooked in a karahi (a thick cooking pan). The dish is known for its simple ingredients and quick cooking method.

    Unlike other Pakistani curries, Karahi uses very few powdered spices. Instead, it relies on fresh tomatoes, ginger, garlic, green chilies, and coriander to produce a rich and aromatic flavor.

    It is usually served hot with naan, roti, or tandoori bread, making it a favorite dish for family dinners and special gatherings.


    Ingredients for Traditional Pakistani Karahi

    To prepare an authentic restaurant-style Karahi, you will need the following ingredients:

    • 1 kg chicken (cut into pieces)

    • 5–6 medium tomatoes (finely chopped)

    • 1/2 cup cooking oil or ghee

    • 1 tablespoon ginger garlic paste

    • 1 teaspoon salt (or to taste)

    • 1 teaspoon red chili powder

    • 1 teaspoon crushed black pepper

    • 1 teaspoon cumin seeds

    • 4–5 green chilies (sliced)

    • 1 tablespoon fresh ginger (julienne)

    • Fresh coriander leaves (for garnish)


    Step-by-Step Cooking Method

    1. Heat the Oil

    Place a karahi or deep pan on medium heat and add cooking oil or ghee. Allow it to heat properly before adding the chicken.

    2. Cook the Chicken

    Add the chicken pieces to the hot oil and fry them for about 5–7 minutes until the color slightly changes. Stir occasionally so the chicken cooks evenly.

    3. Add Ginger Garlic Paste

    Add the ginger garlic paste and cook for another 2 minutes. This step enhances the flavor and removes the raw smell of the chicken.

    4. Add Tomatoes and Spices

    Add chopped tomatoes, salt, red chili powder, crushed black pepper, and cumin seeds. Mix well and cook on medium heat.

    The tomatoes will gradually soften and form a thick gravy.

    5. Cook Until Oil Separates

    Let the Karahi cook for about 10–15 minutes until the tomatoes break down completely and the oil starts separating from the masala. This stage is essential for achieving the authentic restaurant flavor.

    6. Add Green Chilies and Ginger

    Add sliced green chilies and julienne ginger. Cook for another 3–4 minutes to enhance the aroma and taste.

    7. Garnish and Serve

    Finally, garnish with fresh coriander leaves and serve hot.


    Tips for Perfect Restaurant-Style Karahi

    To get the best flavor, follow these expert cooking tips:

    • Use fresh tomatoes instead of canned ones for authentic taste.

    • Cook the dish on high heat at the final stage to mimic restaurant cooking.

    • Avoid adding water unless necessary.

    • Use desi ghee instead of oil for richer flavor.

    • Always add fresh ginger and green chilies at the end for aroma.


    What to Serve with Pakistani Karahi

    Traditional Pakistani Karahi is best served with:

    • Tandoori Naan

    • Roti or Chapati

    • Fresh Salad

    • Raita (Yogurt Sauce)

    These side dishes perfectly complement the rich and spicy flavors of Karahi.


    Variations of Pakistani Karahi

    There are several popular variations of Karahi in Pakistan:

    Chicken Karahi

    The most common version made with tender chicken pieces.

    Mutton Karahi

    A richer and more flavorful version made with goat meat.

    Beef Karahi

    A slow-cooked version known for its deep taste and texture.

    Each variation offers a unique taste while maintaining the signature Karahi flavor.


    Conclusion

    The Traditional Pakistani Karahi Recipe – Restaurant Style is a perfect example of how simple ingredients can create an incredibly flavorful dish. Its rich aroma, bold spices, and fresh garnishes make it a favorite among food lovers across Pakistan and beyond.

    By following this authentic recipe, you can easily recreate the restaurant-style Karahi experience at home and enjoy a delicious meal with family and friends.

    Whether served at a casual dinner or a special gathering, Pakistani Karahi remains a timeless classic that never fails to impress.

  • Homemade Pizza Recipe – Crispy and Delicious

    Homemade Pizza Recipe – Crispy and Delicious

    Introduction

    Homemade pizza is one of the most satisfying and delicious meals you can prepare in your own kitchen. With a crispy crust, flavorful sauce, and perfectly melted cheese, making pizza at home allows you to control every ingredient and customize the flavors exactly to your liking. Whether you prefer classic toppings or creative combinations, homemade pizza offers endless possibilities.

    Preparing pizza at home is also a fun and rewarding cooking experience. It’s perfect for family dinners, weekend treats, or gatherings with friends. In this guide, you will learn how to make a crispy and delicious homemade pizza using simple ingredients and easy steps. Even beginners can follow this recipe to create a restaurant-quality pizza.


    Why Make Pizza at Home?

    There are many reasons why homemade pizza is better than ordering from a restaurant:

    • You can choose fresh and healthy ingredients.

    • It is more affordable than takeout pizza.

    • You can customize toppings according to your taste.

    • Homemade pizza is free from preservatives and artificial flavors.

    • Cooking at home can be a fun activity for the whole family.


    Ingredients for Homemade Pizza

    For the Pizza Dough

    • 2 cups all-purpose flour

    • 1 teaspoon sugar

    • 1 teaspoon salt

    • 1 tablespoon instant yeast

    • 3/4 cup warm water

    • 1 tablespoon olive oil

    For the Pizza Sauce

    • 1 cup tomato sauce

    • 1 teaspoon garlic (minced)

    • 1 teaspoon oregano

    • 1/2 teaspoon black pepper

    • 1/2 teaspoon salt

    For the Toppings

    • 1 cup mozzarella cheese (shredded)

    • 1/2 cup sliced mushrooms

    • 1/2 cup sliced bell peppers

    • 1/2 cup onions (thinly sliced)

    • 1/2 cup cooked chicken or pepperoni (optional)

    • 1 teaspoon chili flakes

    • 1 teaspoon oregano


    Step-by-Step Homemade Pizza Recipe

    Step 1: Prepare the Dough

    In a mixing bowl, combine warm water, sugar, and yeast. Let it sit for about 5–10 minutes until it becomes foamy. This step activates the yeast and helps the dough rise properly.

    Add flour, salt, and olive oil to the yeast mixture. Mix everything together and knead the dough for about 8–10 minutes until it becomes soft and elastic.

    Cover the dough with a cloth and let it rest for 1 hour in a warm place until it doubles in size.


    Step 2: Prepare the Pizza Sauce

    In a small bowl, mix tomato sauce, minced garlic, oregano, black pepper, and salt. Stir well until all ingredients are fully combined. This simple sauce adds rich flavor to your pizza.


    Step 3: Shape the Pizza Base

    After the dough has risen, punch it down gently to remove air bubbles. Place the dough on a floured surface and roll it out into a round pizza base according to your preferred thickness.

    Transfer the rolled dough to a baking tray or pizza pan.


    Step 4: Add Sauce and Toppings

    Spread an even layer of pizza sauce over the base. Sprinkle shredded mozzarella cheese generously on top.

    Add your favorite toppings such as mushrooms, bell peppers, onions, and chicken or pepperoni. Finally, sprinkle oregano and chili flakes for extra flavor.


    Step 5: Bake the Pizza

    Preheat your oven to 220°C (425°F). Place the pizza in the oven and bake for 12–15 minutes or until the crust becomes golden brown and the cheese melts perfectly.


    Tips for a Perfect Crispy Pizza

    • Preheat the oven properly before baking.

    • Use pizza stone or hot baking tray for a crispier crust.

    • Do not overload toppings, as this can make the pizza soggy.

    • Use fresh mozzarella cheese for better flavor.

    • Brush the crust edges with olive oil for a golden finish.


    Popular Pizza Topping Ideas

    If you want to experiment with different flavors, try these topping combinations:

    • Chicken BBQ Pizza – BBQ chicken, onions, mozzarella

    • Veggie Pizza – olives, mushrooms, bell peppers, onions

    • Pepperoni Pizza – pepperoni slices with extra cheese

    • Margherita Pizza – tomato, fresh basil, mozzarella


    Conclusion

    Making a homemade pizza recipe with a crispy and delicious crust is easier than many people think. With simple ingredients and a little patience, you can create a flavorful pizza that rivals your favorite restaurant. Homemade pizza not only tastes amazing but also allows you to experiment with toppings and flavors according to your preference.

    Try this recipe at home and enjoy a fresh, hot, and perfectly crispy pizza with your family and friends.

  • Easy Chicken Biryani Recipe – Step by Step Guide

    Easy Chicken Biryani Recipe – Step by Step Guide

    Introduction

    Chicken biryani is one of the most loved dishes in South Asian cuisine. Known for its rich aroma, flavorful spices, and perfectly cooked rice, this dish has become a favorite for family meals, special occasions, and gatherings. If you love restaurant-style biryani but want to make it at home without complicated steps, this easy chicken biryani recipe is perfect for you.

    In this guide, you will learn how to prepare delicious homemade chicken biryani step by step using simple ingredients that are easily available in every kitchen. Whether you are a beginner or an experienced cook, this recipe will help you create a flavorful biryani with tender chicken and fragrant rice.


    Ingredients for Easy Chicken Biryani

    For the Chicken Masala

    • 500g chicken (cut into medium pieces)

    • 2 onions (thinly sliced)

    • 2 tomatoes (chopped)

    • 1 cup yogurt

    • 2 tablespoons ginger garlic paste

    • 2 green chilies (optional)

    • 1 teaspoon red chili powder

    • ½ teaspoon turmeric powder

    • 1 teaspoon coriander powder

    • 1 teaspoon garam masala

    • Salt to taste

    • 3 tablespoons cooking oil

    • Fresh coriander leaves (for garnish)

    • Fresh mint leaves (for garnish)

    For the Rice

    • 2 cups basmati rice

    • 4 cups water

    • 2 bay leaves

    • 3 green cardamom

    • 4 cloves

    • 1 small cinnamon stick

    • 1 teaspoon salt


    Step-by-Step Cooking Instructions

    Step 1: Wash and Soak the Rice

    First, wash the basmati rice thoroughly until the water becomes clear. Soak the rice in water for about 30 minutes. This helps the rice cook evenly and stay fluffy.


    Step 2: Fry the Onions

    Heat oil in a large pot or pan. Add the sliced onions and fry them until they become golden brown. Remove half of the fried onions and keep them aside for garnish later.


    Step 3: Cook the Chicken

    Add ginger garlic paste to the remaining onions and cook for about 1 minute until fragrant.
    Now add the chicken pieces and cook for 5–6 minutes until the chicken changes color.


    Step 4: Add Spices and Yogurt

    Add the following ingredients to the chicken:

    • Red chili powder

    • Turmeric powder

    • Coriander powder

    • Salt

    • Chopped tomatoes

    Cook the mixture for 5–7 minutes until the tomatoes soften. Then add yogurt and mix well. Let the chicken cook on medium heat until the oil starts separating from the masala.


    Step 5: Boil the Rice

    In another pot, bring 4 cups of water to a boil. Add:

    • Bay leaves

    • Cardamom

    • Cloves

    • Cinnamon stick

    • Salt

    Add the soaked rice and cook until it is 70% cooked. Drain the rice and set it aside.


    Step 6: Layer the Biryani

    Now it’s time to assemble the biryani.

    1. Spread the chicken masala evenly at the bottom of the pot.

    2. Add a layer of partially cooked rice on top.

    3. Sprinkle fried onions, mint leaves, and coriander leaves.

    Repeat the layers if needed.


    Step 7: Steam (Dum) the Biryani

    Cover the pot with a tight lid and cook on low heat for 15–20 minutes. This process, called dum, allows the flavors to blend perfectly.


    Tips for Perfect Chicken Biryani

    ✔ Use long-grain basmati rice for the best texture.
    ✔ Do not overcook the rice before layering.
    ✔ Cook the biryani on low heat for the dum process.
    ✔ Add a few drops of lemon juice or saffron milk for extra flavor.


    Serving Suggestions

    Serve your easy chicken biryani hot with:

    • Raita (yogurt sauce)

    • Fresh salad

    • Lemon wedges

    • Pickles

    These sides enhance the flavor and make the meal even more delicious.


    Conclusion

    This easy chicken biryani recipe is perfect for anyone who wants to enjoy a traditional and flavorful dish at home. With simple ingredients and clear step-by-step instructions, you can prepare a restaurant-style biryani without much effort. Try this recipe for your next family meal and enjoy the rich taste and aroma of homemade chicken biryani.